
Kubernetes is another industry buzz words these days and I am trying few different things with Kubernetes. On Feb 28th, 2018 Apache spark released v2.3.0, I am already working on Apache Spark and the new released has added a new Kubernetes scheduler backend that supports native submission of spark jobs to a cluster managed by kubernetes. The feature is still currently experimental but I wanted to try it out.
I am writing this post because I have to search a lot of things to get it working and there is no single place to get the exact information on how to run spark job on a local kubernetes cluster. I thought writing a post on my findings will enable others not to go through the same pain as I did.
In this post we will take a look on how to setup Kubernetes cluster using minikube on local machine and how to run apache spark job on top of it. We are not going to write any code for this, few examples are already available within Apache Spark distribution and we are going to use the same example jar and run SparkPi program from it onto our kubernetes cluster.
Prerequisites
Before we start please make sure you have the following pre-requisites installed on your local machine.
I am running the tools on Mac High Sierra.
- Apache Spark (v2.3.0)
- Kubernetes (v.1.9.3)
- Docker
- Minikube
- VirtualBox
1. Start Minikube
We can start minikube locally by simply running below command.
Minikube is a tool that makes it easy to run Kubernetes locally. Minikube runs a single-node Kubernetes cluster inside a VM on a local machine. It enables us to try out Kubernetes or develop with it day-to-day.
When minikube starts it starts with a single node configuration and takes 1Gb of Memory and 2 cores of CPU by default, however, for running spark this requirement will not suffice and the jobs will fail (and they do as I have tried multiple times) so we have to increase both Memory and CPU cores for our minikube cluster.
There are three different ways to do this. However, for me not all worked and that’s how I came to know about the different ways to change the minikube configuration. You can use any one of the below ways to change the configuration.
Pass Configuration To Minikube Start Command
You can directly pass the memory and CPU options to the minikube start command like::
This will start a minikube cluster with 8Gb of memory and 4 cores of CPU. (somehow for me this didn't work)
Modify minikube config
We can change the minikube config with config command in minikube cli. The config command allows setting different config options for minikube like memory, CPUs, vm-driver, disk-size etc. To see all the available options use > minikube config command it will list all the available options that can be modified.
After setting configuration using config command we need to delete our previous running cluster and start a new one. To delete minikube cluster run > minikube delete and rerun the start minikube command.
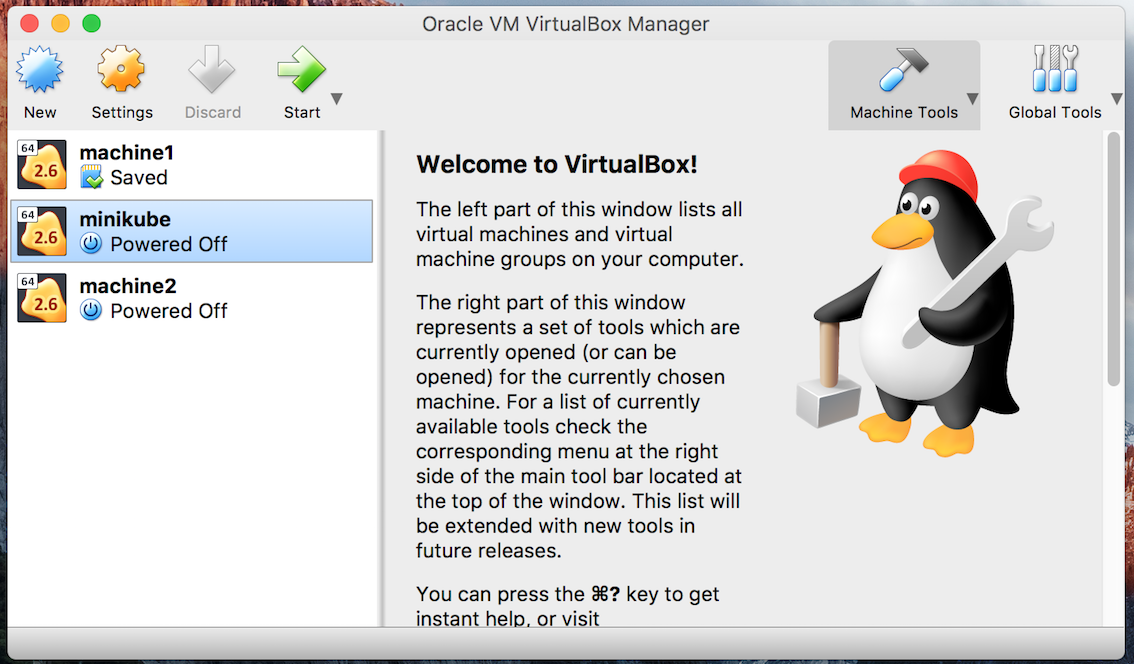
Change Configuration Using VirtualBox
For me, the above two options didn't work and if you are like me you can use this last option which worked for me and hope it works for you. Open VirtualBox app on your machine and select your VM like the one shown in below image. RightClick -> Settings on your VM, this will open the configuration page for the Minikube VM.
note:: To change configuration using VirtualBox first you need to shutdown the VM if it is already running.
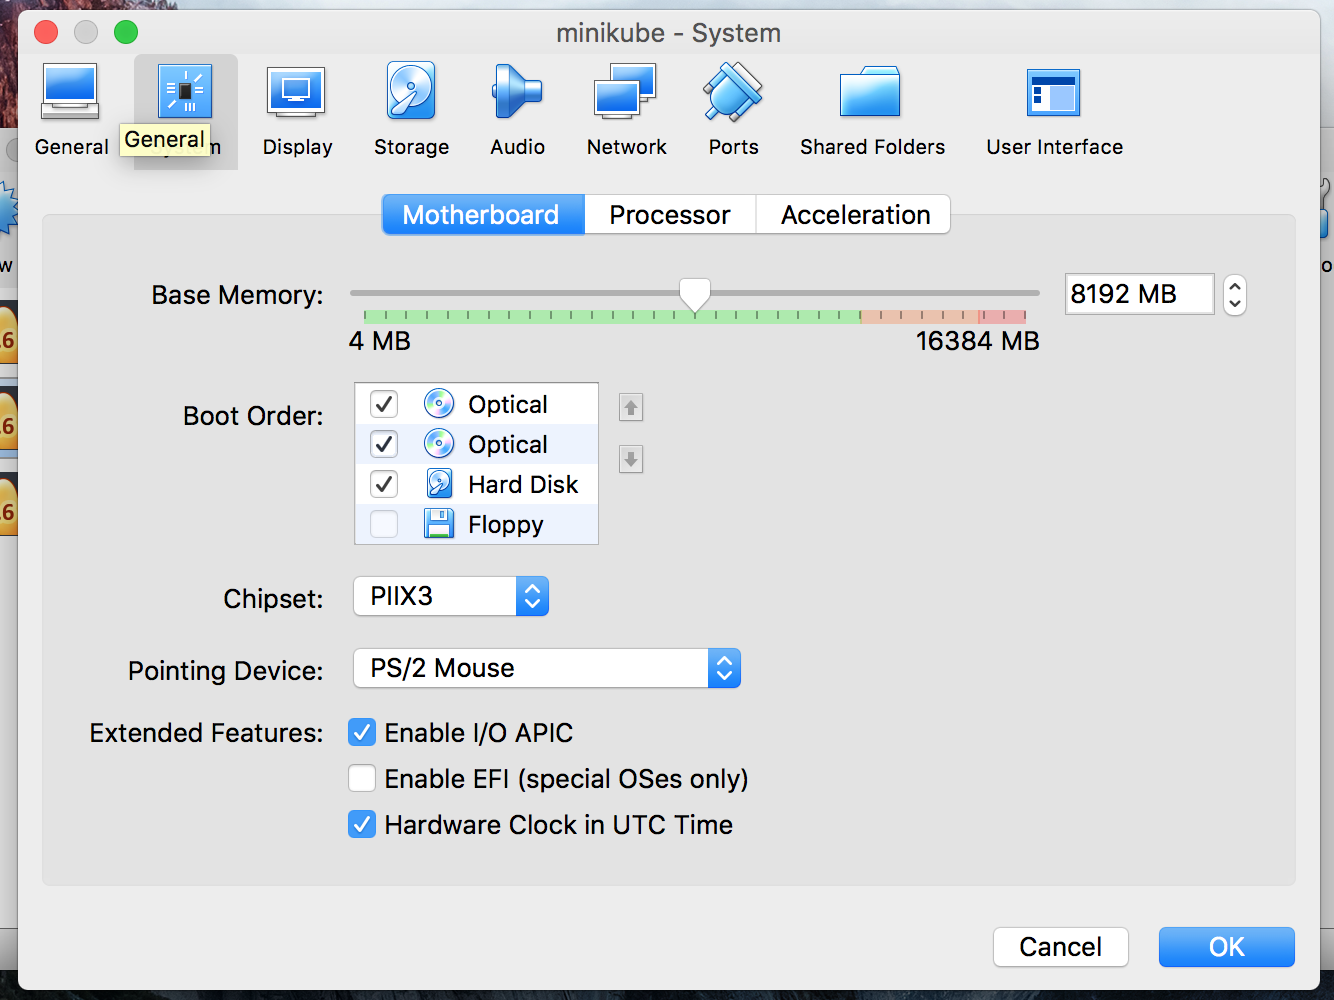
Inside option System -> Motherboard, you can change the memory of the VM using the slider, in my case I have given it 8192MB of memory.
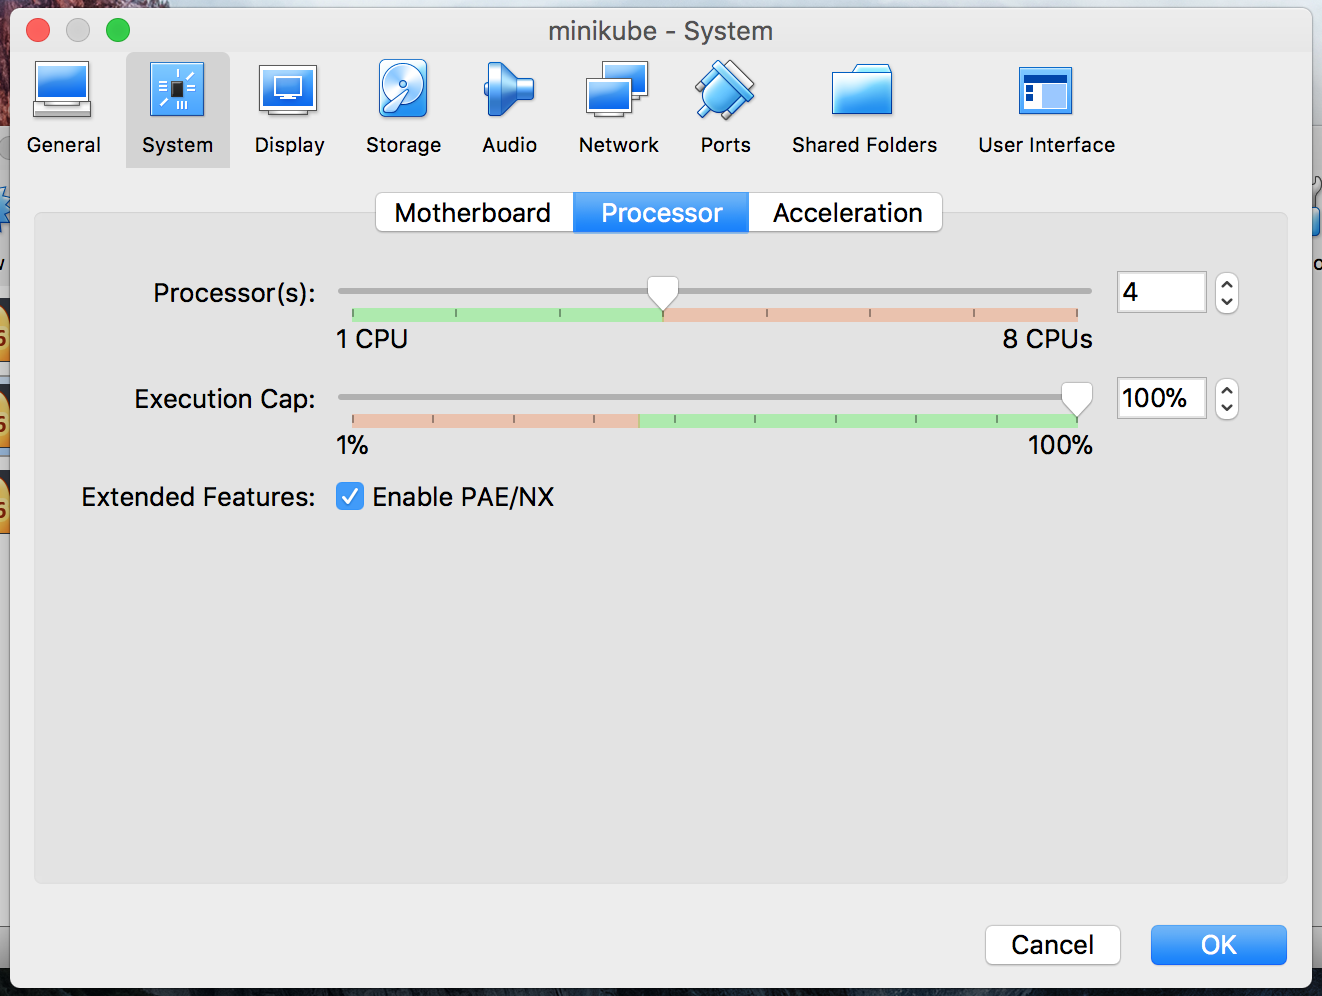
To change the CPU config, go to Processor tab and change it to 4. You can try other options also for me 4 works just fine. Don’t change it to less than 2 otherwise things won’t work. ::p
After the configuration changes are done, start the VM using VirtualBox app or using the above given minikube start command.
Your cluster is running and now you need to have a docker image for spark. Let's see how to build the image next.
Creating Docker Image For Spark
Make sure you have Docker installed on your machine and the spark distribution is extracted.
Go inside your extracted spark folder and run the below command to create a spark docker image
some of the output logs are excluded.
Now if you run > docker image ls you will see the docker build available in your local machine. Make a note of this image name we need to provide the image name to spark-submit command.
There is a push option available to the above command which enables you to push the docker image to your own repository this, in turn, will enable your production kubernetes to pull the docker image from the configured Docker repository. Run the same command without any options to see its usage.
It might happen that the command will not work and will give error like::
This is because of an issue with the docker-image-tool.sh file. I have raised a bug for this in Apache Spark JIRA you can see it here.
The issue is under fix but for you to continue with this post what you can do is open the docker-image-tool.sh file present inside the bin folder and after line no 59 add BUILD_ARGS=(), save the file and run the command once again and it will work.
For those who the above command worked without the workaround the issue might have been fixed at the time you are reading this post and you don't have to do anything hurrah!!!
Submit Spark Job
Now lets submit our SparkPi job to the cluster. Our cluster is ready and we have the docker image. Run the below command to submit the spark job on a kubernetes cluster. The spark-submit script takes care of setting up the classpath with Spark and its dependencies, and can support different cluster managers and deploy modes that Spark supports
options used to run on kubernetes are::
--class:: The entry point for your application (e.g. org.apache.spark.examples.SparkPi)--master:: The master URL for the Kubernetes cluster (e.g. k8s:😕/https://192.168.99.100:8443)--deploy-mode:: Whether to deploy your driver on the worker nodes (cluster) or locally as an external client (client) (default:: client)--conf spark.executor.instances=3:: configuration property to specify how many executor instances to use while running the spark job.--conf spark.kubernetes.container.image=spark-docker:: Configuration property to specify which docker image to use, here provide the same docker name fromdocker image lscommand.local:///opt/spark/examples/jars/spark-examples_2.11-2.3.0.jar:: Path to a bundled jar including your application and all dependencies. The URL must be globally visible inside of your cluster, for instance, an hdfs:😕/ path or a local:😕/ path that is present on all nodes
The package jar should be available cluster-wide either through HDFS, HTTP or should be available within every packaged docker image so that it will be available to all the executor nodes in our spark program. The local:// address means that the jar is available as a local file on every initialized pod by the spark driver and no IO has to be made to pull the jar from anywhere, this works well when application jar is large which is pushed to every worker node or shared using any shared filesystem.
Luckily, our spark docker image file packages the example jar in the docker container so we can use it. However, how to package our own application code and push it either on HDFS or as a separate docker image I will write it as a separate post.
To check if the pods are started and the spark job is running, open kubernetes dashboard available within minikube.
View Minikube Dashboard & Kubernetes Logs
To check the status of our submitted job we can use either kubernetes dashboard or view kubernetes logs. Minikube comes with the dashboard available as an addon and can be started using the following command.
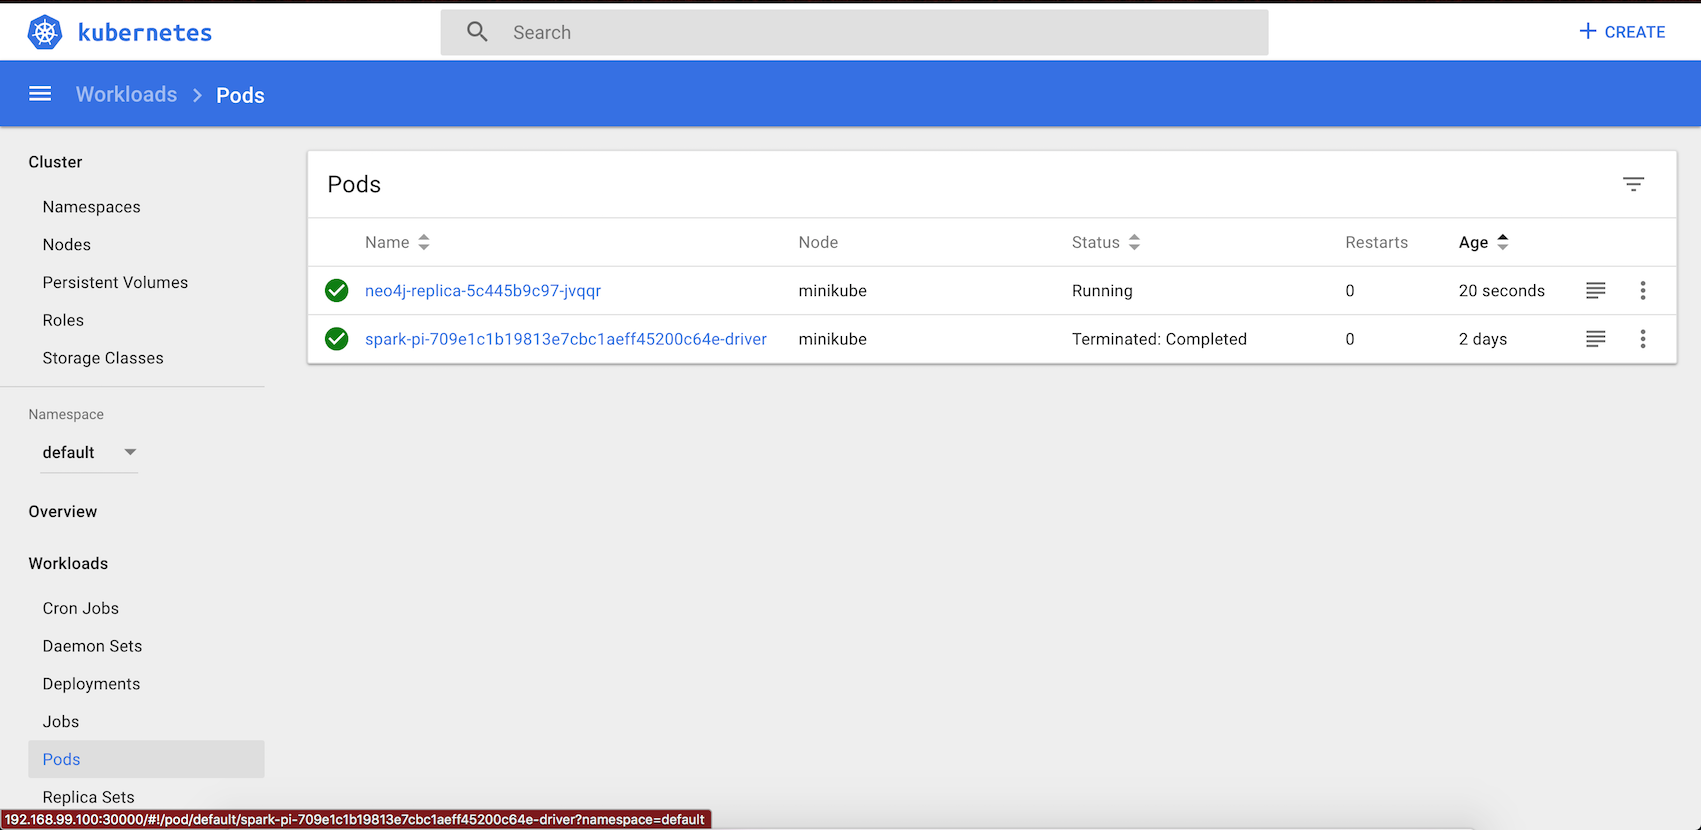
Navigate to the URL given by above command to view the dashboard. The dashboard provides lots of information about cluster memory usage, CPU usage, pods, services, replica set etc. We can also view service logs directly through the dashboard. However, if you don't want to go to the dashboard you can view the Spark Driver log using > kubectl logs <pod name> command::
If you see in the logs the program has calculated the Pi value and the container are stopped in the end.
Shutdown Cluster
Shutting down cluster is very easy, use > minikube stop and it will stop the cluster.
Hope this helps you try running apache spark on local kubernetes cluster. Please do comment if you didn’t understand any step or getting any errors while following the steps and I will try to add more details to the post. Also, please do let me know if you liked it and help others by sharing.
Happy Coding...